Home » Construction » Step-By-Step Guide on How to Repair Concrete Cracks
IN THIS POST
– Required tools and materials
– How to repair concrete cracks
Visible cracks in a concrete driveway, porch or patio can have a negative impact on your property’s value. Not to mention, if you don’t repair concrete cracks as soon as they begin appearing, the problem can soon get out of hands.
In case you are putting off this home improvement project due to budget restriction, the good news is that you don’t need to hire a professional to repair surface cracks on your concrete floors. Also, the required are pretty inexpensive and widely available. You may even have most of these at your home.
However, before you begin, please check to see if these cracks appear rather deep. If so, it can be an indicator of foundation or water damage, which means you must consult with a professional before the situation gets worse.
If you are new to the world of DIY home improvement, don’t forget to take a look at our guide on the differences between cement, concrete and mortar before starting on the project.
Required Tools and Materials

- Concrete mix
- Mortar
- Chisel
- Hammer
- Caulking tube
- Pointed trowel
- Steel scrub brush
- Broom
- Dustpan
- Vacuum cleaner
- Sealant
- Paint roller or bristle brush
How to Repair Concrete Cracks in 5 Easy Steps

Here are the main steps to fix cracks in a concrete floor.
Step 1: Clean the surface
Step 2: Chisel out the crack
Step 3: Patch the surface
Step 4: Let it cure
Step 5: Seal the concrete
Sounds simple enough, right? Let’s discuss each of these steps to repair concrete cracks in detail for a better understanding.
Step 1: Clean the Surface
To repair cracks in concrete, you must first clean the surface with a steel scrub brush. If your floor has any grease or oil stains, you will have to get rid of them as well. For this purpose, you can either use a store-bought chemical cleaner such as WD-40 or an oven cleaner, though if you use the latter, make sure to let it sit on the floor for at least 10 minutes before scrubbing the stains away.
Moreover, use a broom and dustpan to properly clean the floor and collect all the debris and lose pebbles that may have settled in the cracks on the ground. You can even use a vacuum cleaner for this. Once done, it is recommended to wash the area with a high-pressure hose and then let it dry completely before moving on to the next step.
STEP 2: Chisel out the Crack (Optional)
This step is optional, though if you have enough time and materials, it is advised that you don’t skip it.
If you are planning to fill large cracks in concrete, take a chisel and place its blade on the inside of the crack. Then, strike the other end of the chisel with a hammer to widen the base of the crack on the floor so its surface area increases. Most experts recommend this trick because chiselling out the crack allows the new concrete mix to bond with the surface and patch up the old crack. It is also referred to as ‘keying.’
However, don’t forget to get rid of debris and concrete particles once you are done widening the crack. You can start cleaning the surface with a broom and then use a vacuum to thoroughly clean the larger cracks on the concrete floor.
STEP 3: Patch the Cracks on the Floor
There are several concrete crack repair products available in the market. If you are looking to fix hairline cracks in concrete, then you may want to use mortar to repair the floor. Since this material acts as a glue and is usually used for the installation of floor tiles in the bathroom or to install tile backsplashes in the kitchen, it works perfectly well for minor surface cracks. You can use a caulking tube to fill the small cracks in concrete with mortar mix and then use your finger to smoothen the surface.
However, please note that mortar isn’t as strong as concrete. Therefore, it might not be suitable to repair large cracks in concrete.
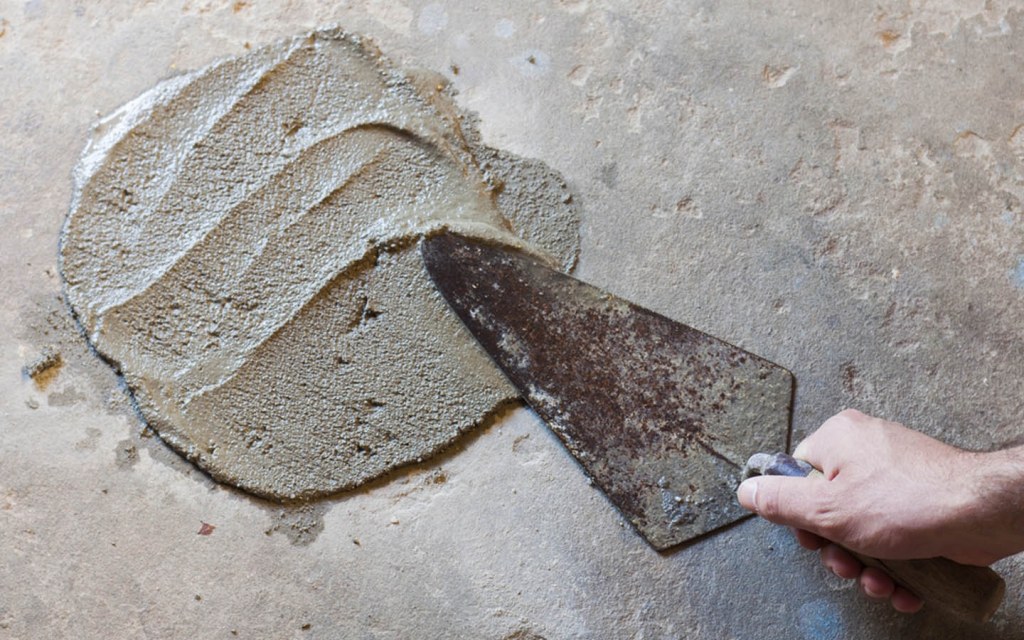
Instead, you can use a concrete mix to repair concrete cracks that are wider or deeper. Although it’s a construction material and is not used for binding, it is your best option to patch up any wide cracks or fissures on the surface. Just mix it with water according to the manufacturer’s instruction and use a pointed trowel to push it into the cracks. Wait for it to settle down and add some more concrete mix if needed. Make sure to smooth out the surface before the concrete dries, otherwise, you’d be left with an uneven and unsightly surface following the concrete crack repair.
STEP 4: Allow the Concrete to Cure
Depending on the size of the patch, you should leave it overnight or for about 24 hours to cure completely. You can put bricks around the patch to make sure no one accidentally steps on to the wet concrete. This is one of the most important steps to repair concrete cracks. Once the patch isn’t wet to touch and is completely cured, check to see if you need to add more of the concrete mix to fill the crack, because sometimes the material tends to settle down deeper into the fissure.
STEP 5: Seal the Concrete
If you are satisfied with your concrete crack repair, now it’s time to seal the patch. Since concrete tends to absorb water and stains rather easily, it is recommended to use a water-based polyurethane sealant to seal the floor. This will protect the new concrete patch from absorbing any moisture that may damage it. For rough concrete floors, a broom or a bristled brush can be used to apply the sealant, whereas a paint roller would be an ideal tool for smoother surfaces.
Polyurethane dries rather quickly, so you won’t have to wait overnight to be able to apply the second and third coats. However, if you are planning to opt for epoxy flooring in the near future, you should leave out this step as epoxy paints do not bind with sealed or polished concrete floors.
Meanwhile, if you are tired of your boring, grey concrete floors, take a look at our DIY tips on how to boost the appeal of a concrete porch for some budget-friendly and creative ideas.
For more easy DIY home improvement guides, head over to Zameen Blog – the leading construction and real estate blog in Pakistan. You can also send us your concerns and queries on blog@zameen.com. Also, don’t forget to subscribe to our newsletter if you want to stay updated about the latest property and home décor trends in the country.


